Using YouTube videos with students can be really great, but finding a video with the exact language you want and at a suitable length with too many other distractions around can be really difficult. That's why SafeShare.TV is so useful.
First find a YouTube clip that has a section that you would like to use. I chose this one from ‘Room with a View’ http://www.youtube.com/watch?v=Tehft3GDw6k. At 9 mins it's quite long so I just wanted to use a few sections.
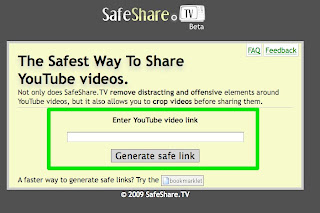
Copy the URL and then go to: http://www.safeshare.tv/. Paste the link into the field then click on ‘Generate safe link’.
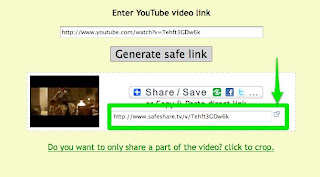
 This will create a new link to the video which you can then use with your students to show them the clip.
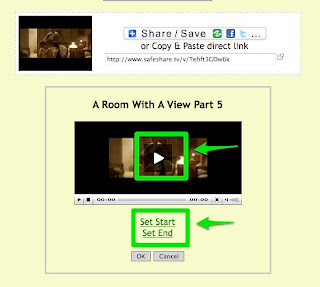
 When the students open the link they will only see the single video clip with it’s title, like the example below.
 If you want to crop the clip so that only a short part of it shows, then generate your safe URL and then click on the link that says 'Do you want to only share a part of the video? click to crop.' This will open a small video viewer. Click the video to watch it, then click on ‘Set Start’ at the beginning of the segment you want students to see. Watch the segment and click ‘Set End’ at the end of the segment. Now click ‘OK’
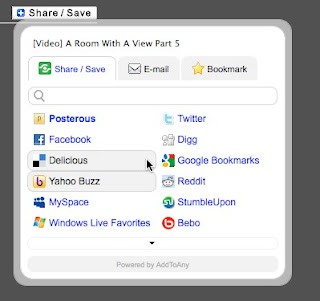
Once you have clicked 'OK' your safe link will be adapted to only show the section of the video you have selected. You can then either copy the link to share with students or share it through a variety of social networking mediums.
Here's a quick video tutorial showing how to do this.
You can download this video here or download a copy for i-Touch or i-Phone here
How can we use this with students?
Clipping videos makes it much easier for us to create activities and tasks that focus on specific areas of the video clip without having to watch the whole thing.
What I like about it
You can find 25 more video related activities for EFL and ESL students here.
Related links:
Nik Peachey
 SafeShare.TV is a tool that has two primary functions. The first is to enable you to share YouTube videos using a direct URL that frames the video without the advertising and other distracting features that might cause students to wander off into less suitable materials.
- The second and perhaps even more useful function of SafeShare.TV is that it enable you to crop the video clip so that only a particular part is shown. This is particularly useful when you want to build activities or tasks around clips that focus students on particular linguistic features.

First find a YouTube clip that has a section that you would like to use. I chose this one from ‘Room with a View’ http://www.youtube.com/watch?v=Tehft3GDw6k. At 9 mins it's quite long so I just wanted to use a few sections.
Copy the URL and then go to: http://www.safeshare.tv/. Paste the link into the field then click on ‘Generate safe link’.
 This will create a new link to the video which you can then use with your students to show them the clip.
 When the students open the link they will only see the single video clip with it’s title, like the example below.
 If you want to crop the clip so that only a short part of it shows, then generate your safe URL and then click on the link that says 'Do you want to only share a part of the video? click to crop.' This will open a small video viewer. Click the video to watch it, then click on ‘Set Start’ at the beginning of the segment you want students to see. Watch the segment and click ‘Set End’ at the end of the segment. Now click ‘OK’
Once you have clicked 'OK' your safe link will be adapted to only show the section of the video you have selected. You can then either copy the link to share with students or share it through a variety of social networking mediums.

Here's a quick video tutorial showing how to do this.
You can download this video here or download a copy for i-Touch or i-Phone here
How can we use this with students?
Clipping videos makes it much easier for us to create activities and tasks that focus on specific areas of the video clip without having to watch the whole thing.
- You can select example phrases to show the use of language in context, such as a telephone call or a scene that shows someone booking into a hotel etc.
Here’s an example: Booking a hotel room This was trimmed from a much longer clip on YouTube - You can show students the beginning to a clip and ask them to predict what’s ‘going to’ happen next.
Here are two examples:
1. What's going to happen?
2. What's going to happen?
- You can show the beginning and end of a clip and ask students to predict what ‘has happened’ in between.
Example:
They watch this one
Then this one
- You can show students a number of sections from the same clip and ask them to order them either by using linguistic or visual clues and explain their rationale.
Here are 5 clips for you to try to order:
Clip 1
Clip 2
Clip 3
Clip 4
Clip 5
- You can show each student in a group a different sections of the clip (like the 5 sections above) and then ask them to work together to describe the part they watched and put the different sections into the correct order as a group.
- You can use the sections to focus on the use of specific structures, like this one for ‘should have’ Should have clip or this one for the use of 3rd conditional 3rd conditional clip
- At the end of these types of activities you can show them the complete clip. http://www.safeshare.tv/v/Tehft3GDw6k
What I like about it
- It’s free and easy to use
- It gets your students right to the part of the video you want them to see
- It allows you to easily split videos into shorter clips
- there’s a simple ‘bookmarklet’ that you can drag to your favourites bar, then whenever you find a YouTube clip your want to use you just click on it to get the SafeShare.TV link.
- Sometimes it doesn’t work on my MAC
- It would be great to have an embed code as well as a URL
You can find 25 more video related activities for EFL and ESL students here.
Related links:
- Quick Twitter Video Activity
- 20 WebCam Activities for EFL ESL Students
- Sending Bubble Joy to your EFL / ESL Students
- Microblogging for EFL with Plurk
- Great Video Commenting Tool
- Video conferencing for EFL
- Send Free Video Messages
- Animated Music Videos for EFL
- Creating multimedia stories
- 12 Second Video Clips for EFL ESL
- Tutorial: Using Videos from YouTube
- Great Video Commenting Tool
Nik Peachey


